
- 1 - Overview of DIY Carpet Installation
- 2 - Essential Tools for Carpet Installation
- 3 - Step-by-Step Guide to Installing Carpet
- 4 - Common Mistakes to Avoid During Carpet Installation
- 5 - Tips for a Successful Carpet Installation
1 - Overview of DIY Carpet Installation
Installing carpet by yourself can seem like a daunting task, but with the right tools, knowledge, and a bit of patience, you can transform your room without hiring a professional. DIY carpet installation not only saves you money, but it also gives you the satisfaction of completing a home improvement project. This guide will walk you through the process, step by step, and provide you with the necessary tips to achieve a professional-looking result.

2 - Essential Tools for Carpet Installation
Before starting your DIY carpet installation, it’s important to have the right tools. Here are the essential tools you’ll need:
2.1 Carpet Cutter
A carpet cutter is essential for cutting your carpet to size. It’s designed to make clean, straight cuts and is safer than using a utility knife.
2.2 Carpet Stapler
A carpet stapler is used to attach the carpet to the tack strip along the edges of the room. It helps secure the carpet tightly, ensuring a smooth and professional finish.
2.3 Tack Strips
Tack strips are narrow wooden strips with nails used to hold the carpet in place. They are essential for creating a foundation for your carpet installation.
2.4 Knee Kicker
The knee kicker is a tool used to stretch the carpet across the room and secure it in place. It's crucial for avoiding wrinkles and ensuring a snug fit.
2.5 Carpet Pad
Carpet padding is an important component that adds comfort and extends the life of your carpet. It should be installed underneath the carpet to provide support and cushioning.
3 - Step-by-Step Guide to Installing Carpet
Follow these steps to install carpet like a pro:
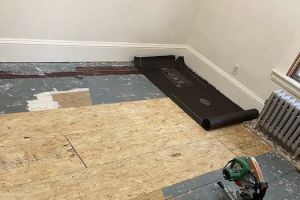
3.1 Remove the Old Carpet and Prepare the Floor
Start by removing the old carpet and padding from the room. This may involve cutting the old carpet into manageable sections and pulling it up. After the carpet is removed, clean the floor and make sure it's smooth and level. Repair any uneven spots before proceeding.
3.2 Install Tack Strips
Next, install the tack strips along the perimeter of the room, leaving a small gap (about 1/2 inch) from the wall. Make sure the strips are positioned with the pins facing toward the wall, as they will hold the carpet in place once it's stretched over them.
3.3 Lay Down the Carpet Pad
Roll out the carpet padding across the floor. Cut it to fit, leaving a small gap between the padding and the walls. Staple or tape the padding down to prevent it from shifting as you install the carpet.
3.4 Cut and Lay the Carpet
Measure the carpet to fit the room, making sure to account for the edges. Use the carpet cutter to trim the carpet to size. Lay the carpet on the floor, ensuring it overlaps the tack strips and padding.
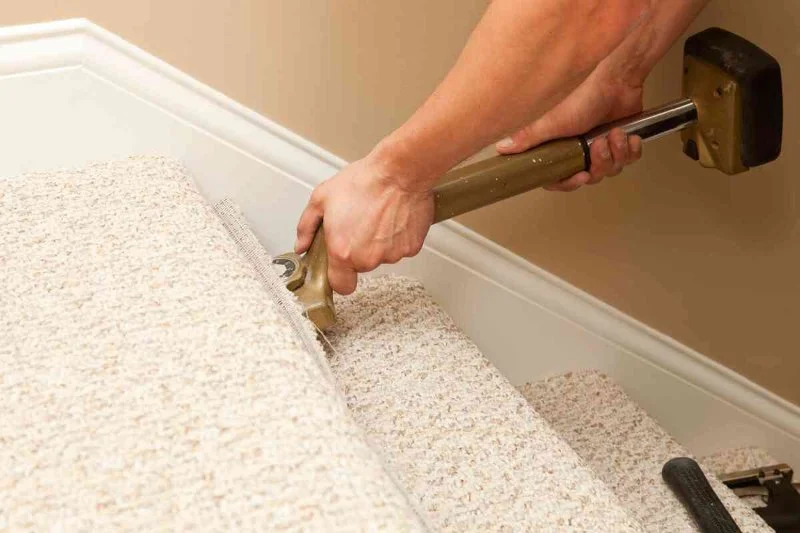
3.5 Stretch the Carpet and Secure It
Use the knee kicker to stretch the carpet tight, starting at one corner of the room. Gradually move along the walls, stretching the carpet and attaching it to the tack strips. Once the carpet is tightly secured, trim any excess carpet along the edges.
3.6 Trim the Edges and Finish
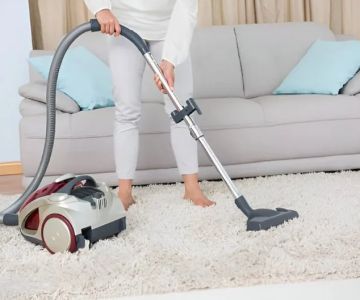
Once the carpet is in place, use a utility knife to trim the excess carpet along the walls. Make sure the edges are neat and tucked under the baseboards. The final step is to vacuum the entire area to remove any debris and give your new carpet a polished look.
4 - Common Mistakes to Avoid During Carpet Installation
While installing carpet yourself is rewarding, it’s important to avoid common mistakes that can ruin the result. Here are a few things to keep in mind:
4.1 Incorrectly Placing the Tack Strips
Placing the tack strips too close to the wall or too far apart can affect the overall fit of your carpet. Always follow the manufacturer’s guidelines for proper placement.
4.2 Overstretching or Understretching the Carpet
Stretching the carpet too much can lead to wrinkles, while not stretching enough will leave the carpet loose. Use the knee kicker carefully to ensure the right amount of tension.
4.3 Not Preparing the Subfloor Properly
If the subfloor isn’t properly cleaned or leveled, it can affect the installation process and the longevity of your carpet. Make sure the floor is smooth and dry before starting.
5 - Tips for a Successful Carpet Installation
Here are some additional tips to make your carpet installation go smoothly:
5.1 Plan Your Installation on a Clear Day
For the best results, plan to install carpet on a dry day when the humidity is low. High humidity can cause carpet to stretch and contract, affecting the installation.
5.2 Have a Helping Hand
Carpet installation can be a lot easier with help. Consider having a friend or family member assist you in laying down the carpet and stretching it into place.
5.3 Don’t Rush
Take your time with each step of the process to ensure the best results. Rushing through the installation can lead to mistakes that affect the final appearance of your carpet.
For the best carpet options and tools, check out CarpetHub for expert recommendations and top-quality products that will make your DIY project a success.


 Over the Edge3.0 (8 reviews)
 Carpet Palace Flooring4.0 (26 reviews)
 Allerdice Ace Hardware4.0 (153 reviews)
 Fike Bros Carpet One Floor & Home4.0 (45 reviews)
 Old New House (Retail Showroom) - BY APPOINTMENT5.0 (3 reviews)
 The Home Depot4.0 (1233 reviews)
 How to Handle Carpet Stains and Spills Like a Pro | Expert Cleaning Tips
 How to Incorporate Carpets in Homes with Hardwood Floors
 Top Carpet Trends to Follow in 2025
 The Pros and Cons of Carpet Tiles: Is This Modular Flooring Right for You?
 How to Choose the Best Carpet for Your Home’s Unique Features
 Carpet or Hardwood? Making the Right Choice for Your Home