
Carpet Pile Direction: Plan the Visual Before Installation
On this page
Quick answer
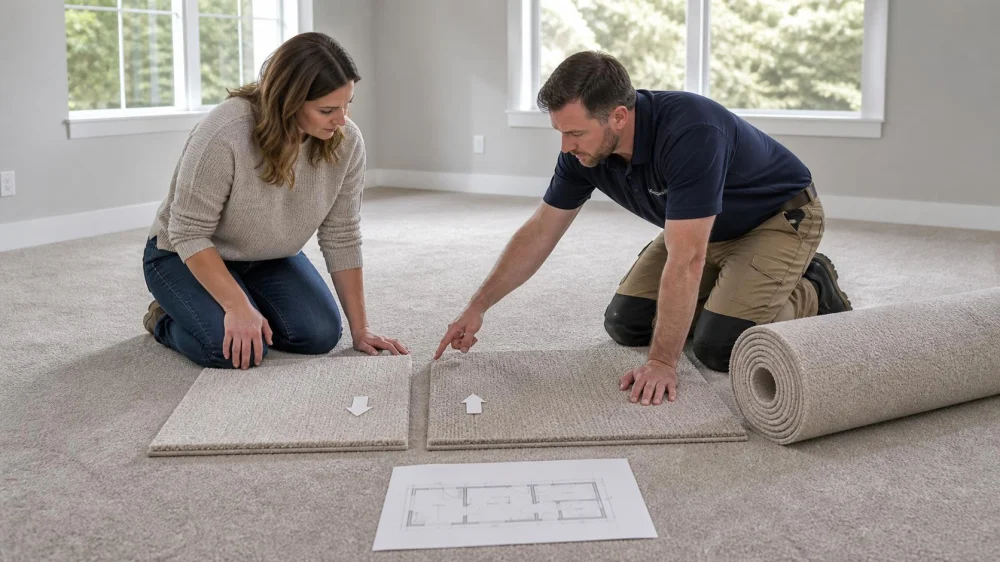
Carpet pile has a lay direction that changes how light reflects, so the same colour can look lighter or darker when viewed from opposite ends. Before cutting, confirm the manufacturer’s direction markings, room viewing points, seam plan, stairs, and connected spaces. Keep adjoining pieces oriented consistently unless a documented design or installation requirement calls for another layout.
Understand pile direction
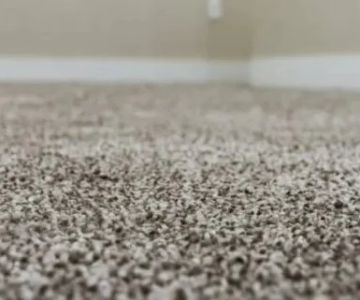
Tufted fibres lean or flow slightly as carpet leaves production and is rolled. Running a hand in one direction may feel smooth and in the other may lift the pile. This affects reflection, vacuum marks, footprints, and perceived colour. It does not automatically mean the carpet has a dye defect.
Texture matters. Plush and velvet-like products often show shading strongly, while patterned loop or low-profile commercial carpet may show less. Some styles are intentionally designed for visual movement or random appearance. Read the product description and warranty rather than expecting a completely uniform field.
Check light and viewing angle
Lay a large sample on the floor and rotate it 180 degrees. View it from the room entrance, main seating position, hallway, and window side in daylight and evening light. A small upright sample board does not reproduce floor reflection accurately. Photograph both orientations from the same point.
Strong windows, skylights, and directional fixtures can exaggerate pile contrast. Decide which viewpoint matters most. Many installers orient pile toward the primary entrance or light source according to product and layout practice, but room shape and continuous runs can change the decision. Document the chosen direction rather than relying on memory.
Coordinate rooms and seams
Connected carpet pieces should usually run in the same manufacturing direction. Reversing one piece can make a seam look like two colours even when dye lot matches. Ask the estimator to mark arrows on the scaled plan and show how roll width, pattern repeat, waste, and seam placement affect direction.
An L-shaped hall, open-plan suite, or doorway between rooms can create competing priorities. Changing direction at a threshold may be visually acceptable when rooms are clearly separate, but the transition should be planned. Never rotate a fill piece merely to save material without approval; short-term waste savings can create a permanent shade mismatch.
Plan stairs and transitions
Stairs introduce bends over nosings and strong viewing from above. The product must be suitable for stair use and installed in the manufacturer-approved direction and method. Pattern orientation, nap, nosing shape, waterfall versus upholstered installation, and landing seams all affect appearance.
At hard-floor transitions, confirm the arrow in relation to the doorway and adjacent carpet. Door swing, edge finishing, transition profiles, and height still matter. A runner or area rug placed later can show a different nap direction; that is normal for a separate removable textile.
Approve the roll layout
Before cutting, verify product, colour, dye lot, roll numbers, width, visible damage, and direction arrows on labels. Ask the installer to dry-plan unusual fills or pattern joins. The written work order should identify the approved room arrows and any area where direction changes intentionally.
Do not discard roll labels or leftover material immediately. Save a labelled remnant with the pile arrow, product information, and installation date. It can help with future repair, warranty review, or comparison. Keep enough usable material according to project advice, stored dry and protected from crushing.
Inspect after installation
Walk the project from agreed viewing points before furniture return. Look for a piece that reflects opposite to its neighbours, unexpected direction change, seam visibility beyond the product expectation, and pattern alignment. Use normal room lighting and observe after the pile has recovered from rolling and installation.
Vacuum according to manufacturer guidance to lift and align fibres, but do not expect vacuuming to reverse a physically rotated piece. Photograph concerns and preserve labels. Report promptly to the retailer or installer and ask whether the condition is normal shading, temporary compression, seam appearance, or an orientation error.
Frequently asked questions
Why does carpet look like two colours?
Opposite pile direction can reflect light differently. Dye lot, lighting, crushing, seams, and actual colour variation are other possibilities, so compare direction marks and samples.
Can installers rotate a piece to reduce waste?
Only when the product and approved plan allow it. Rotation may create visible shade or pattern differences. Review the tradeoff before cutting.
Do all carpets have a visible nap?
Most have some manufacturing direction, but visibility varies. Plush, dense cut pile often shows it more than random-texture or certain loop products.
Evidence and limitations
This guide reflects common carpet estimation and installation practice: identify manufacturing direction, orient connected pieces consistently, evaluate floor-level light, coordinate seams, and preserve labels. Product-specific manufacturer instructions and applicable installation standards control. Patterned, woven, modular, and specialty carpets may require different rules.
Conclusion and next steps
Rotate a sample in the actual room, mark the preferred direction on the plan, and coordinate every connected piece, seam, stair, and transition. Approve the roll layout before cutting. After installation, inspect from the same viewpoints and report any unexplained reversal with photos and saved labels.

 F.M. Floors Supplies5.0 (2 reviews)
 Floor & Decor4.0 (261 reviews)
 Boro Rug & Carpet Warehouse4.0 (83 reviews)
 Long Island Paneling, Ceilings & Floors4.0 (41 reviews)
 SI Carpeting4.0 (8 reviews)
 E M Brown4.0 (29 reviews)
 How to Get Rid of Bad Odors in Your Carpet: Proven Solutions
 Best Carpet Brands for Budget-Friendly Homes: Affordable Options for Every Home
 What Colors Designers Are Choosing for Carpet in 2026 | CarpetHub
 How to Use Carpet to Add Style to Your Living Room
 How to Choose Carpet That Fits Your Budget and Style
 What Are the Benefits of Carpet in a Home with Allergies? | CarpetHub