
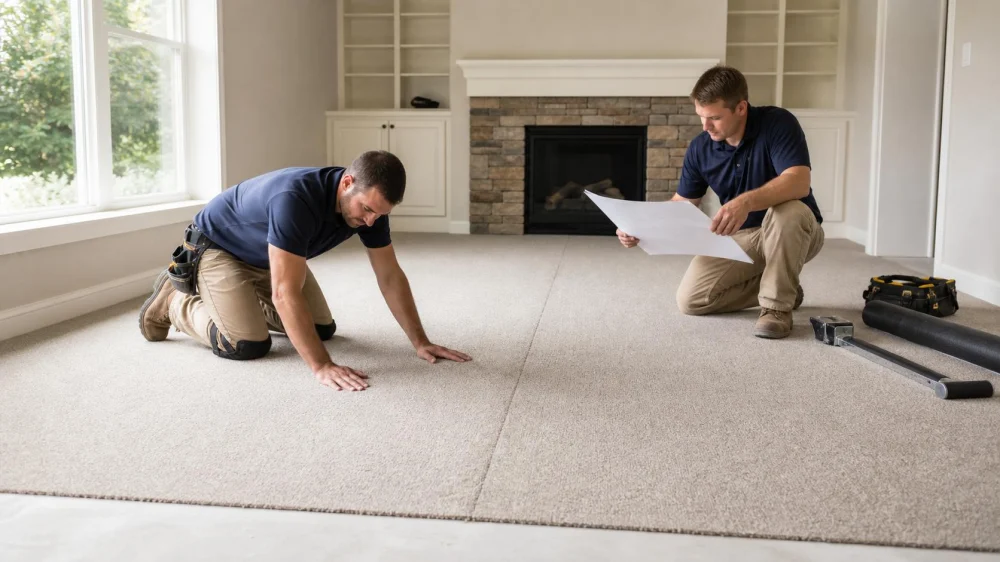
Carpet Seam Placement: Light, Traffic, and Room Layout
On this page
Quick answer
Carpet seams are often necessary when a room is wider than the carpet roll or has complex shapes. Plan them before ordering so they avoid concentrated traffic, pivot points, stairs, direct sightlines, and harsh cross-light when practical. Keep pile direction consistent, balance seam visibility against material waste, and approve a scaled layout that shows doors, closets, furniture, roll width, and pattern matching.
This guide helps US homeowners discuss seam placement. Manufacturer instructions and professional installation standards control the work.

Essis & Sons Carpet One Floor & Home
MechanicsburgCumberland CountyPennsylvania
6220 Carlisle Pike, Mechanicsburg, PA 17050, USA
Why carpet needs seams
A carpet seam joins two carpet pieces to cover a space. Broadloom carpet comes in finite roll widths, and a room may exceed that width, turn through a hallway, include alcoves, or require pattern alignment.
“No seams” may be impossible or may require buying much more carpet, rotating pile direction, or creating awkward cuts elsewhere. The goal is a well-constructed seam in a thoughtful location, not a promise that every join will be invisible from every angle.

What makes a seam visible
Cross-light from large windows or low fixtures can cast a shadow along a seam. A line perpendicular to the main light may show more than one aligned with it, though room geometry and pile still matter.
Traffic can compress edges, soil a pathway, and stress a joint. Avoid placing seams where people repeatedly pivot, where a rolling chair changes direction, or directly through the narrow center of a doorway when another layout works.
Carpet construction affects appearance. Dense cut pile, loop patterns, rows, stripes, and printed motifs each require specific alignment and seaming methods. Directional shading can make two correctly matched pieces look different if pile orientation changes.
Subfloor and pad must be flat and supported. A ridge, gap, pad seam, or movement beneath the joint can telegraph through the finished carpet.
Plan the layout
- Measure the whole connected area. Include closets, bays, halls, stairs, door swings, hearths, cabinets, and transitions.
- Record roll width. Use the actual ordered product, not a generic assumption.
- Mark pile direction. Keep connected visible areas consistent as required.
- Map light. Note large windows, glass doors, low lamps, and daylight direction.
- Map traffic. Trace walking paths, doorway pivots, chair movement, and furniture routes.
- Map furniture. A seam under stable furniture may be less visible, but avoid putting it under a row of sharp moving legs or a heavy object that complicates repair.
- Add pattern repeat. Pattern matching can increase waste and shift seam locations.
- Compare alternatives. Review seam count, linear footage, waste, cost, and visible locations for each layout.
Review the seam diagram
Ask for a scaled drawing with each carpet piece, seam, pile arrow, roll width, pattern direction, doorway, and transition. Verify that the drawing matches field measurements and the exact product. A sketch that omits closets or alcoves can hide an extra seam.
Ask why each seam is placed there and what alternative was rejected. Sometimes moving a seam away from a window adds a large amount of waste. Decide whether the visibility benefit justifies the material and cost.
Confirm who approves changes if the delivered roll, pattern bow, room dimensions, or subfloor condition differs. Do not let an installer improvise a materially different seam layout without documented approval.
Installation-day checks
- Match product, dye lot, roll numbers, and visible condition before cutting.
- Confirm room orientation and pile arrows with the lead installer.
- Ensure the subfloor is clean, dry, flat, and ready.
- Keep cushion seams offset from carpet seams as required by the system.
- Protect seam edges from contamination and unraveling.
- Use manufacturer-approved seam tape, adhesive, tools, and temperature.
- Avoid walking, rolling, or placing furniture on fresh seams until permitted.
- Photograph the layout and seam locations for future reference.
Expectations and problem signs
A new seam can be noticeable initially because pile was compressed on the roll or disturbed during installation. Proper vacuuming and settling may change appearance. Ask the installer what is expected for the carpet type.
Contact the provider for persistent edge separation, fraying, a hard raised ridge, gap, color or pile-direction mismatch, adhesive transfer, pattern offset beyond product tolerance, or movement underfoot. Keep people away from a trip hazard.
Do not cut fibers, apply household glue, steam the seam, or aggressively brush it before warranty review. Photograph the issue in daylight and room lighting from several angles.
FAQ
Can every carpet seam be invisible?
No. Skilled planning and installation reduce visibility, but lighting, pile, pattern, traffic, and viewing angle can reveal a seam.
Should seams always run toward the window?
Light direction is one factor, not a universal rule. Traffic, roll width, pile direction, room shape, pattern, and waste also matter.
Is one long seam better than two short seams?
Not automatically. Location, stress, visibility, pattern alignment, and material layout determine the better plan.
Can a seam go under a door?
Some transitions belong at doorways, but a carpet-to-carpet seam in a pivot zone may receive concentrated traffic. Review the exact opening.
Why does the carpet look different on each side?
Pile direction, shading, dye variation, or lighting may be involved. Ask for inspection before assuming the seam itself failed.
Next steps
Mark light, walking paths, furniture, and doors on the measured plan. Request two seam layouts with waste and cost, verify pile direction and pattern repeat, and sign off on the final diagram before the roll is cut.
Evidence note: This article reflects broad carpet layout and installation principles. Product instructions, accepted standards, and site conditions control seam construction.



 Super Value Household4.0 (150 reviews)
 Innovative Carpets5.0 (1 reviews)
 Baystate Rug and Flooring3.0 (22 reviews)
 Gentile's Floor Center4.0 (21 reviews)
 Godfrey Family Carpets4.0 (50 reviews)
 Daniels Floor Care5.0 (74 reviews)
 The Benefits of Custom Carpets for Your Home Design
 How to Choose the Right Carpet for Your Kids’ Rooms
 How to Maintain Your Carpet in a Busy Household
 Carpet vs. Hardwood: Which Flooring Option Is Right for You? | CarpetHub
 The Best Carpet Choices for Modern Farmhouse Homes
 Creating a Warm and Inviting Space with Carpets: Expert Tips and Ideas