
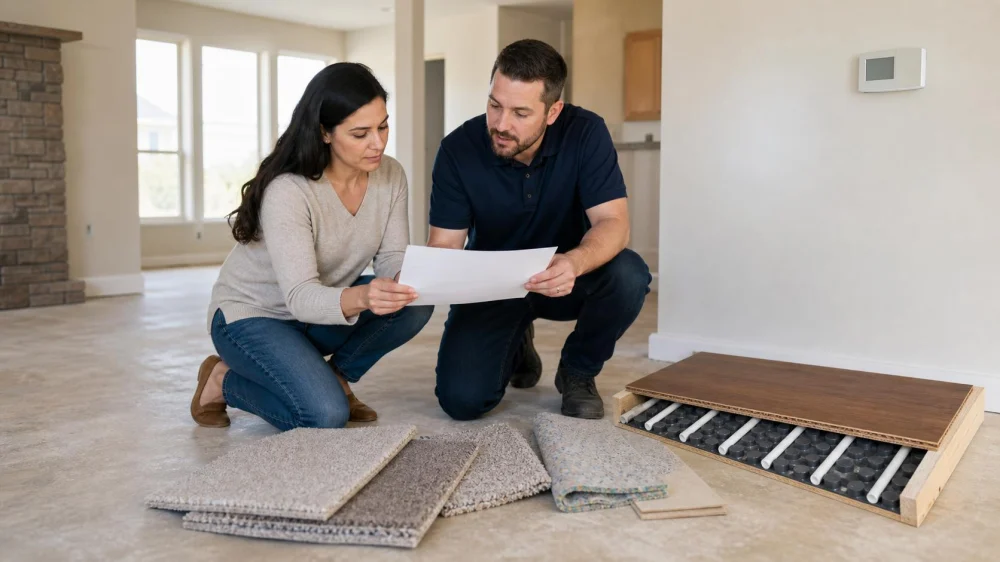
Carpet Over Radiant Heat: Confirm Materials, Limits, and Controls
On this page
Quick answer
Identify the exact radiant system and obtain written approval from the heating-system, carpet, pad, adhesive, and installation providers before ordering. Compare the combined floor-covering thermal resistance with the design, confirm surface and operating limits, sensor and thermostat locations, subfloor moisture requirements, and the approved startup sequence. Keep product data and commissioning records together; do not cover, energize, or modify the system outside documented instructions.

North Haven Tile Carpet One Floor & Home
WallingfordSouth Central Connecticut Planning RegionConnecticut
2 Toelles Rd, Wallingford, CT 06492, USA
Why compatibility belongs to the whole floor assembly
Heat must move from the system through the subfloor, underlayment or pad, carpet backing, and pile into the room. Each layer adds resistance, while moisture, adhesives, sensors, furniture, rugs, and control settings affect performance. A carpet labeled suitable for one system does not automatically approve the pad, glue, subfloor, temperature, or installation method around it.
This guide is for United States homeowners planning carpet over an existing or proposed residential radiant floor. It is not electrical, hydronic, structural, moisture, or fire design. New systems, repairs, commissioning, and concealed-component locations require qualified trades and current manufacturer and code guidance.
Practical checklist
- Hydronic tubing, electric cable, mat, film, panel, or another radiant system; manufacturer, model, age, drawings, zones, output, control, and warranty.
- Subfloor type and condition, levelness, cracks, fasteners, moisture testing, vapor control, insulation below, prior floor, patching, and approved preparation.
- Carpet fiber, construction, pile, backing, product code, manufacturer radiant-heat approval, thermal resistance, dimensional stability, and warranty exclusions.
- Pad material, density, thickness, thermal resistance, radiant approval, seams, fasteners, adhesive, tack strip, double-stick method, and accessibility needs.
- Combined assembly thermal resistance, design heat loss, supply temperature or electrical output, floor-surface limit, room comfort, and energy implications.
- Thermostat, floor and air sensors, sensor location, calibration, maximum setting, setback, furniture or rug coverage, and safe access to controls.
- Installer qualifications, permits, electrical or plumbing checks, pressure or resistance tests, commissioning, gradual startup, handoff, invoices, and warranties.
Step-by-step plan
- Collect the radiant-system model, drawings, control settings, past service, and current operating condition before carpet selection or floor demolition.
- Ask the system designer or qualified trade to define the allowed floor assembly, thermal resistance, surface conditions, temperature limits, and test procedure.
- Submit the exact carpet, pad, adhesive, seam, fastener, and installation method to each responsible manufacturer or contractor for written compatibility.
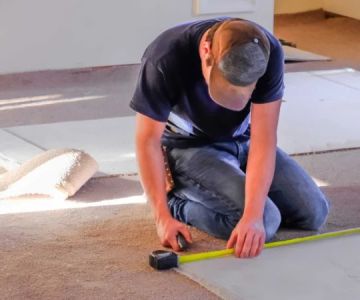
- Coordinate subfloor inspection, moisture testing, sensor and tube or cable locations, tack-strip setbacks, transitions, doors, and any prohibited penetrations.
- Before covering, perform required electrical, pressure, control, and photographic documentation with qualified trades, then protect the system during installation.
- Follow the approved installation and curing sequence, leaving the radiant system off or controlled as required and avoiding unapproved staples or cuts.
- Commission and increase heat only under the documented schedule, verify sensor and room response, then save baseline settings and all warranties.
Keep the radiant-system manual and layout, zone and sensor locations, design limits, pre-cover test results, photos, moisture data, carpet and pad technical sheets, combined thermal-resistance calculation, adhesive and installation approvals, permits, installer details, curing and startup log, control settings, invoices, and warranties.
Limits and important notes
Do not drill, staple, nail, cut, or probe where tubing, cable, film, or sensors may be concealed. Do not assume a thin carpet is approved, stack unapproved rugs or pads, cover vents or controls, bypass a floor sensor, raise limits to overcome slow heating, or energize during adhesive curing contrary to instructions.
Stop work for unknown system type, missing layouts, failed resistance or pressure tests, moisture outside limits, damaged cable or tubing, leaks, hot spots, odor, discoloration, tripping breakers, control faults, or conflicting manufacturer instructions. Use qualified electrical, hydronic, flooring, moisture, or design professionals to resolve the conflict before covering.
Frequently asked questions
Can any carpet go over radiant floor heating?
No. The exact carpet and full assembly must meet the heating system, manufacturer, design, installation, and warranty requirements.
Is thinner carpet always better?
Not automatically. Thermal resistance, backing, pad, comfort, durability, stability, and manufacturer approval all matter together.
Can the thermostat simply be turned higher?
No. Controls and floor limits protect the assembly and comfort; higher settings may violate design, material, energy, or safety requirements.
May installers staple the pad?
Only where the approved system layout and installation method allow it. Concealed heating components make unplanned penetrations hazardous.
When can heat restart after installation?
Follow the documented adhesive, floor-covering, and system startup sequence, which may require curing and gradual temperature changes.
Sources and evidence
Use the exact radiant-system design and manufacturer manual, carpet, pad, adhesive, and installation technical documents, current local code and permit requirements, subfloor moisture guidance, and written instructions from qualified trades. Those project-specific sources override a generic checklist.
Conclusion and next steps
Identify the system, collect its layout and limits, and have the full carpet, pad, adhesive, and installation assembly approved in writing. Coordinate moisture, sensors, penetrations, tests, curing, controls, and gradual startup, then preserve the commissioning record and baseline settings with every product and labor warranty.


 Floors by Recon5.0 (3 reviews)
 Factory Carpet Outlet4.0 (45 reviews)
 Carpet Village Inc4.0 (4 reviews)
 Statewide Flooring4.0 (24 reviews)
 A Cleaner Image4.0 (33 reviews)
 Queen City Flooring Solutions4.0 (15 reviews)
 The Best Carpet for Pet Owners: A Complete Guide
 Understanding the Cost Differences Between Carpet Types
 How the Right Carpet Can Help Maintain a Healthy Indoor Environment
 Carpet Care Tips for Homes with Small Children
 Carpet and Allergy Solutions for Homeowners: Cleaner Indoor Air Guide
 How to Find Carpet Deals Near You and Save More